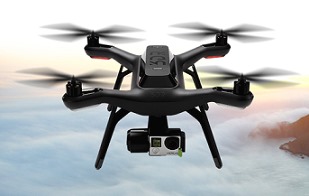
아래의 사이트는 ArduCopter의 비행제어보드(Flight Controller board)의 펌웨어에 대한 자료와 최신 코드를 받을 수 있는 곳입니다.


ArduCopter는 Full-Featured Multicopter UAV로서 비행제어보드의 모든 펨웨어는 오픈소스(Open Source)입니다.


http://code.google.com/p/arducopter/


'Radio Control > Flight Controller' 카테고리의 다른 글

3DR社의 Pixhawk  (0) 2013.10.23
APM 2.5의 수정판인 APM 2.6이 출시되었네요  (0) 2013.07.31
다양한 Flight Controller 비교  (0) 2013.05.06
APM2.5를 이용한 멀티콥터의 구성  (1) 2013.01.30
ArduCopter란?  (0) 2013.01.09
Posted by Nature & Life


최근에 멀티콥터를 비행 제어할 수 있는 메인보드(Flight Controller board)를 비교한 자료입니다. 이 자료는 다음의 사이트에 근거합니다.

(번역이 원문과 상이하거나 매끄럽지 못한 부분은 댓글로 남겨 주시면 감사하겠습니다)


http://oddcopter.com/flight-controllers/?


Flight Control Board

Open Source

Gyro Stabilization

Self Leveling

Care Free

Altitude Hold

Position Hold

Return Home

Waypoint Navigation

Pricing

AeroQuad 32

Yes

Yes

Yes


Yes

Add-on

Add-on

Add-on

Medium

ArduCopter (APM 2.5)

Yes

Yes

Yes

Yes

Yes

Yes

Yes

Yes

Medium

AutoQuad v6.6

Yes

Yes

Yes

Yes

Yes

Yes

Yes

Yes

High

Crius All In One PRO

Yes

Yes

Yes

Yes

Yes

Add-on

Add-on

Add-on

Low

Crius MultiWii Lite

Yes

Yes

Yes


Low

Crius MultiWii SE

Yes

Yes

Yes

Yes

Yes


Low

DJI Naza


Yes

Yes

Add-on

Yes

Add-on

Add-on


Medium

DJI Wookong


Yes

Yes

Yes

Yes

Yes

Yes

Add-on

High

Free Flight


Yes

Yes


Low

FY-30A


Yes

Yes


Medium

Gaui GU-344


Yes


Medium

Hobbyking KK2.0

Yes

Yes

Yes


Low

HoverflyPRO


Yes

Yes

Add-on

Yes

Add-on

Add-on

Add-on

High

HoverflySPORT


Yes


Add-on


Medium

KKMulticopter

Yes

Yes


Low

MikroKopter Flight-Ctrl


Yes

Yes

Add-on

Yes

Add-on

Add-on

Add-on

High

MultiWii PRO / MTK GPS

Yes

Yes

Yes

Yes

Yes

Yes

Yes

Yes

Low

MultiWii PRO 2.0 / MTK GPS

Yes

Yes

Yes

Yes

Yes

Yes

Yes

Yes

Low

OpenPilot CC3D

Yes

Yes

Yes


Low

Paris MultiwiiCopter

Yes

Yes

Yes

Yes

Yes

Add-on

Add-on

Add-on

Medium

Quadrino ZoomFlight

Yes

Yes

Yes

Yes

Yes


Medium

Rabbit


Yes

Yes

Yes

Add-on

Add-on

Add-on


Low

SmartAP Autopilot


Yes

Yes

Yes

Yes

Yes

Yes

Yes

High

TMF Pro FH-X46 AQ50


Yes

Yes


Medium

UAVP/UAVX

Yes

Yes

Yes

Yes

Yes

Yes

Add-on

Add-on

Low

XAircraft FC1212-P


Yes

Add-on

Add-on

Add-on

Add-on

Add-on


Medium

Zero UAV YS-X6


Yes

Yes


Yes

Yes

Yes

Yes

High


Flying capabilities

  • Gyro Stabilization - the ability to easily keep the copter stable and level under the pilot's control. This is a standard feature of all flight control boards. (조종사의 통제하에 콥터를 안정된 레벨로 쉽게 유지시키는 기술로 모든 비행 제어 보드에 표준 특성입니다)
  • Self Leveling(ACC) - the ability to let go of the pitch and roll stick on the transmitter and have the copter stay level. (송신기에서 피치나 롤 스틱을 제어하는 것 없이 콥터가 일정한 레벨을 유지하도록 하는 기술입니다)
  • Care Free- The pilot can control the copter as if it is pointing in its original direction as the orientation of the copter changes. (조종사는 콥터의 방향이 변함에 따라서 마치 최초 방향을 기억하는 것처럼 콥터를 제어할 수 있습니다)
  • Altitude(Height) Hold - the ability to hover a certain distance from the ground without having to manually adjust the throttle. ( 스로틀을 수작업으로 맞추는 것 없이 지표로부터 일정거리 부양해서 정지비행이 가능하게 하는 기술입니다)
  • Position Hold - the ability to hover at a specific location. (특정 위치에서 정지비행이 가능하게 하는 기술입니다)
  • Return(Come) Home - the ability to automatically return to the point where the copter initially took off. (콥터가 처음에 이륙한 위치로 자동적으로 되돌아오는 기술입니다)
  • Waypoint Navigation - the ability to set specific points on a map that copter will follow as part of a flight plan. (콥터가 경유할 특별한 위치를 지도상에 설정할 수 있는 기술입니다)


Pricing

  • Low - less than $100
  • Medium - $100-300
  • High - $300+.


Posted by Nature & Life


APM2.5(Ardupilot Mega V2.5) 보드를 이용한 멀티콥터의 구성의 예를 살펴보기로 합니다.


이 구성은 헥사콥터(Hexacopter)로 추력을 발생시키는 프로펠라(이하 '프롭'으로 약칭)와 모터를 탑재한 날개가 8개인 멀티콥터(Multicopter)가 됩니다.


위 그림에서 APM2 보드는 APM2.5 보드의 전신으로 기능상 거의 동일하며 주변장치와의 연결만을 살펴보는 것으로는 충분할 것으로 생각됩니다.


1. 수신기(Reciever; RX) : 무선 조종기(Transmitter; TX)의 수신장치로 기존에는 수 십 MHz의 주파수대역을 세계적으로 나뉘어 사용하였지만 최근에는 2.4GHz 대역를 사용함으로 인해서 안테나의 길이가 짧아져 벌거롭게 안테나를 폈다 접었다 할 필요가 없어졌으며 혼선을 최소화하고 채널당 정보량도 많아져 양방향 수신까지도 가능하다고 전해집니다. 그림에서는 6채널로 각 채널에 서보(Servo)가 할당된다면 독립적으로 6개의 기구적 서보를 동작시킬 수가 있을 것입니다.


2. LiPo 4S는 헥사콥터에 전원을 공급하는 밧데리로 이전에는 니켈-카드뮴(NiCd) 충전지를 사용하다가 최근에는 리튬이온(LIon)이나 리튬폴리머(LiPo)를 사용하는데 이는 이러한 밧데리 등이 메모리 효과가 없다는 것을 제외하더라도 충전용량이 매우 증가하였고 방전용량도 크게 향상되었다는 것입니다. 최근 RC 스포츠의 보급은 고용량 충전지의 개발과 비약적인 발전과 무관하지 않은데 그 이유는 과거 니트로(Nitro) 엔진만이 할 수 있었던 것을 전기 모터가 이를 충분히 대체하였고 관련 전자부품 등의 빠른 개발속도와 대량화로 가격인하가 많았다는 것입니다.


3. ESC는 'Electronic Speed Controller'의 약자로 APM2.5 보드로부터 오는 신호의 크기에 따라 모터의 속도를 제어하는 장치입니다. 만일에 모터가 회전자에 전기를 공급하는 기계적 접촉면을 가진 전통적인 DC 모터일 경우에는 속도를 제어하는 것이 쉽지만 대부분의 RC 스포츠에 사용되는 모터는 이러한 기계적 접촉이 없는 즉, 브러시(brush)가 없는 3상 모터로 효율이 좋지만 비싸고 제어가 쉽지 않다는 단점이 있습니다.


4. 모터(Motor)는 ESC에서 설명한 것처럼 Brushless DC Motor를 사용하는 것이 일반적이며 기계적 접점이 없어 소음이 적고 수명이 반영구적이지만, 제어가 복잡하여 전용 제어기가 필요하고 비싸다는 단점이 있습니다. ESC와 모터는 헥사콥터이므로 8조가 필요하고 APM2.5 보드는 조종기로부터 신호에 따라 이들 8개의 모터를 적절히 각각 제어하여 이착륙 및 비행 등이 가능하게 됩니다.


5. PDB는 'Power Distribution Board' 보드의 약자로 8개의 모터는 통상 비행시 수에서 수십 혹은 수백 암페어의 전류를 소비하게 됩니다. 따라서 배선은 이를 가능하도록 선간 저항을 최소화 함과 동시에 8개의 날개로 가는 경로상에 비대칭이 없이 균일한 전류가 흘러가도록 하는 기구물이 됩니다. 날개간 미세한 전류의 차이는 추력의 차이로 나타날 수 있으며 이는 안정된 비행을 방해하고 이러한 문제는 더 많은 전류를 소비하는 멀티콥터일수록 더욱 민감해지게 될 것입니다.


6. UBEC는 'Ultimate BEC(Battery Elimination Circuit)'를 약칭하는 것으로 이는 밧데리로부터 공급된 전압을 APM2.5 보드의 정격전압으로 맞추어 공급하기 위한 일종의 레귤레이터가 됩니다. 그림의 경우에는 밧데리는 4셀이므로 14.8V인데 이를 BEC를 이용하여 5V로 변환하여 APM2.5 보드에 공급하게 됩니다. 전통적으로 선형적인 레귤레이터(Linear regulator)를 사용하였지만 감압되어지는 만큼 전력 손실이 발생하기에 최근에는 이를 최소화하기 위하여 DC-DC 컨버터를 사용하는 추세이며 이러한 기술을 적용한 BEC가 Ultimate BEC라 합니다.


Posted by Nature & Life


ArduCopter란 쿼드콥터(quadcopter)나 헥사콥터(hexcopter) 또는 기존의 헬기 등을 제어하기 위한 보드 등의 하드웨어나 펌웨어(firmware) 그리고 조종을 위한 소프트웨어(software)의 개발을 위한 프로젝트 이름으로 일반 상업적인 쿼드콥터 브랜드와는 다릅니다.


그러므로 오픈 소스 UAV 프로젝트이며 보드의 MCU는 AVR을 사용하는데 AVR 펌웨어의 개발 역시 Arduino 개발환경을 사용하므로 오픈 소스이고 마치 리눅스처럼 누구나 다양한 피드백을 줄 수 있으며 참여 또한 가능합니다.


한편 하드웨어로서 APM은 AutoPilot-Mega의 약자로 ArduCopter의 비행제어기(Flight Controller, FC)인데 DJI WKM과 비슷한 성능을 가지면서 멀티위(Multiwii)처럼 오픈 소스(open source) 기반으로 사용자가 직접 펌웨어에 접근할 수 있으며 수정 또한 가능하다는 것입니다. 특히, APM 제어기는 멀티콥터(ArduCopter) 뿐만 아니라 일반 비행기(ArduPlane)나 자동차(ArduRover) 등에 응용하여 사용이 가능하며 일반적으로 ArduFlyer라고 부릅니다.


최근에는 ArduCopter의 'Ardu' 대신에 'APM:'붙여 APM:Copter, APM:Plane 그리고 APM:Rover로 이름을 변경하였습니다.

http://ardupilot.org/


아래의 글은 다음의 원문으로부터 번역을 토대로 필자가 재작성한 것이니 양지바랍니다.

http://code.google.com/p/arducopter/wiki/ArduCopter


ArduCopter는 쿼드콥터나 헥사콥터 등의 Multirotor 헬기나 기존 헬기를 쉽게 설정하고 비행할 수 있도록 기존 수동제어의 개념을 탈피하여 완전한 UAV 솔루션으로 기존 매니아 층의 무선 조종 뿐만아니라 자동 비행 기능을 제공하고 또한 지상에서 강력한 모니터링 기능과 경유지점(waypoint)과 비행 임무 설정이 가능합니다.


ArduCopter는 나르는 로봇으로 견줄만큼 진보된 각종 기술과 첨단 기술 그리고 새로운 비행 스타일을 원하는 매니아들을 위해 개발된 것으로 이 ArduCopter 프로젝트는 DIY Drones community에 의해 개발된 APM 2.x 자동 조종 장치에 기반을 두고 그 프레임과 부품은 jDrones Asia와 3D Robotics에서 공급하며 모든 기능을 갖추었지만 작은 Multicopter와 헬기는 APM 2.x을 이용하여 쉽게 UAV 성능으로 업그레이드 할 수 있다고 합니다.


특징:
- 높은 품질의 자동레벨 및 자동 고도제어 - 온보드 magnetometer를 사용하여 노트북에서 클릭하는 것만으로 쉽게 헬기를 조종하므로 기존의 헬기 조종처럼 헬기의 움직에 고도로 집중할 필요가 없습니다.


- 사용자의 프로그래밍은 필요하지 않으며 한 번의 클릭으로 소프트웨어를 로드하고 빠른 시각적 디스플레이로 ArduCopter를 조종할 수 있습니다.


- 무제한으로 경유지점과 미션 지점을 클릭하여 ArduCopter를 이동할 수 있으며 거리에 제한이 없고 카메라 제어를 포함한 모든 임무를 스크립트 형태로 수행할 수 있습니다.


- GPS와 고도센서를 이용하여 언제든지 헬기의 제자리 비행이 가능합니다.


- 어떤 위치에 홈을 설정하고 ArduCopter가 자동으로 돌아오도록 설정이 가능합니다.


- 양방향 통신으로 비행 중에도 경유점과 모든 제어 변수 등의 변경이 가능합니다.


- 단순한 스위치 조작만으로 자동 이륙 및 착륙이 가능합니다.


GCS(Ground Control Station):


경유지점(Waypoint):


ArduCopter에 장착된 카메라는 pan과 tilt 기능을 제어할 수 있으며 Windows, Mac 및 Linux등 다양한 O/S를 지원합니다.


주의사항:
- 다른 비행기나 단일로터 헬기에 대한 비행 경험이 도움이 되며 이는 ArduCopter가 단순히 RC 장난감이 아니기 때문입니다.

- ArduCopter는 오픈 소스 UAV로 차후에 새로운 기능이 추가될 수 있습니다.


비행 영상:

http://www.youtube.com/watch?v=YvTj6dlQ9fo&feature=player_embedded


Posted by Nature & Life


http://diydrones.com/profiles/blogs/check-our-new-apm-2-0-revision-the-apm-2-5


I’m pleased to announce the new APM 2.0 revision, better known as APM2.5!

But before you start screaming that you just got an APM 2.0, let me explain that there’s NO difference in performance at all between the two, the board is still the same in terms of functionally and it runs exactly the same code as APM 2.0. We just took the liberty of throwing in a few new universal connectors in there (so accessories can be cross compatible with the new PX4 and protect the user from connecting the cable in the wrong direction), some production improvements that will allows to manufacture it faster and finally we added some protection features to protect it from those reverse polarity/short circuit lovers.

Here goes the full list of changes (you already know all its features):


1. No more shield/daughterboard: magnetometer and dataflash were moved to the main board, making it easier to assemble, repair and hack.


2. No more on-board GPS, but we added a new 6-pins DF13 connector for our new GPS cable standard (PX4) and kept the old but reliable Molex (EM-406) connector for old GPS compatibility.


3. The old radio-modem connector is gone and now is being replaced by our new 6-pins DF13 connector (like the GPS, because both are UART’s. Got it?), this will make it compatible with PX4 and prevents users from blowing up the UART mux.


4. We added a second protection fuse and diode (you are no longer required to solder it yourself) for extra reverse polarity and short circuit protection.


5. The old I2C connector is gone and has been replaced by our new 4-pins DF13 connector (yeah PX4 compatible. Oh wait correction… None of both (PX4 & APM2.5) are compatible with each other, we created this standard together as a team, but I have to give the average of the credits to PX4).


6. Added a “mystery” 6-pin DF13 Connector that will be used later. I know you like surprises so please stay tuned. No big deal but is really cool and will save you some soldering here and there.


7. Added “Magnetometer Jumper” that allows you to disable the on-board magnetometer, so you can attach an external one.


8. Added extra LED attached to the PPM encoder (Atmega32-U2) on pin PC7. This will allows us later to use it as PPM status indication and leave those poor TX/RX LED’s do their intended job.


Those who ordered the APM2.0 and are still waiting for it (only if is not shipped yet) will have the option to upgrade to the new APM2.5, but you will be required to wait an extra couple of weeks for production to begin. For upgrades please send us an email to sales@3drobotics.com. 

If you want to order one now you can get the assembled version here and the unassembled version here (for those who want their choice of RC connector: straight or right-angled). They will begin shipping in a week or so, but if there is a huge flood of orders, the backlog for any individual order may grow to 2-4 weeks. We're making them at the new Tijuana facility, so we hope that we'll be able to keep up with demand much better than we have in the past. We're committed to shrinking all delays, and our investment in the Tijuana facility is just one sign of this.

The APM 2.0 enclosures will not fit this new board, so new enclosures are on their way. If you buy an APM 2.5 now, you will get a $4.99 credit for a free enclosure with your next order (the enclosures should be in in about a month).  Also, APM 2.5 will ship with an adapter cable for the 3DR/Xbee radios, converting from the APM 2.5 DF13 connector to the radios' conventional 6-pin connectors. Eagle files for the boards will be posted in the next few days.


Posted by Nature & Life